How to Clean an Air Conditioner: A Step-by-Step Guide
Cleaning your air conditioner is essential for maintaining its efficiency and longevity. Regular maintenance ensures that your unit runs smoothly, providing optimal cooling while reducing energy consumption. By learning how to clean an air conditioner yourself, you can save on professional service costs and keep your home environment comfortable. This guide will walk you through the necessary steps, from gathering tools to the final reassembly and testing. Each step is designed to be straightforward and manageable, even for those new to DIY home maintenance. Following these instructions not only enhances the performance of your air conditioner but also extends its lifespan, ensuring you get the most out of your investment.
Why is Cleaning Your Air Conditioner Important?
Cleaning your air conditioner is crucial for several reasons. First, it helps maintain the efficiency of the unit, ensuring it cools your home effectively without overworking and consuming excess energy. This can lead to significant savings on your energy bills. Second, a clean air conditioner improves indoor air quality by preventing the buildup of dust, mold, and other allergens that can circulate through your home. Lastly, regular cleaning reduces wear and tear on the components, extending the lifespan of the unit and reducing the likelihood of costly repairs or replacements. By keeping your air conditioner clean, you ensure a healthier, more efficient, and cost-effective cooling system.
What Tools Do You Need to Clean an Air Conditioner?
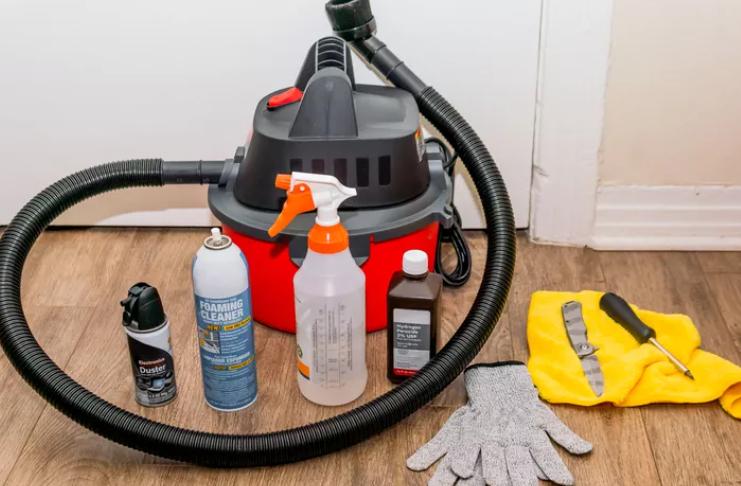
Before you begin cleaning your air conditioner, gather the necessary tools to ensure a thorough job. You will need a screwdriver to remove panels and access internal components, a vacuum with a soft brush attachment for dust removal, and a coil cleaner to tackle the condenser and evaporator coils. A fin comb is essential for straightening any bent fins, while a mild detergent and a bucket of warm water are useful for cleaning the filter and other washable parts. Additionally, have a soft cloth or sponge on hand for wiping down surfaces and a garden hose for rinsing the outdoor unit. With these tools ready, you can efficiently clean your air conditioner and keep it in optimal working condition.

Process to Clean the Air Conditioner
Step 1: Refresh or Replace the Air Filter
Start by turning off the power to the air conditioner. Locate the air filter, usually found behind the front grille or inside the air handler unit. If the filter is reusable, remove it and gently wash it with warm water and mild detergent. Rinse thoroughly and let it dry completely before reinserting it. If the filter is disposable, replace it with a new one. Regularly cleaning or replacing the air filter is vital as it traps dust and debris, preventing them from entering the system. A clean filter improves air flow and efficiency, reducing strain on the air conditioner and enhancing indoor air quality. Make it a habit to check the filter every month during peak usage and replace or clean it as necessary.
Step 2: Wash the Exterior and Interior Components
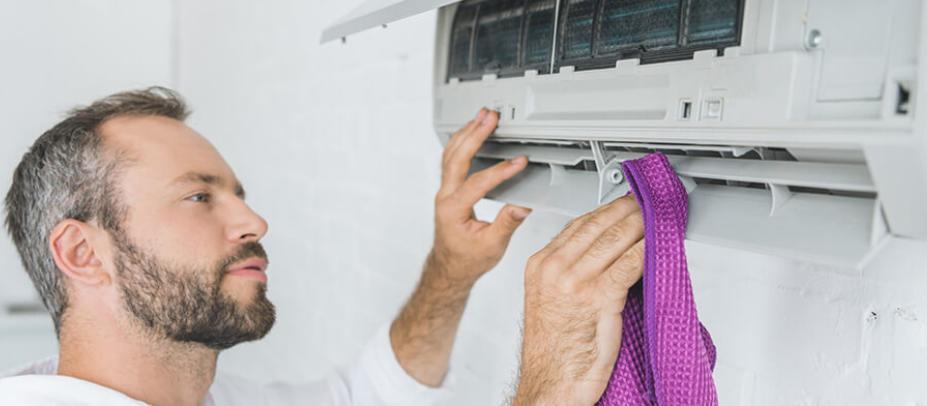
Next, clean the exterior and interior of the air conditioner unit. For the exterior, use a soft cloth or sponge dampened with warm, soapy water to wipe down the surfaces. Pay special attention to the vents and louvers, removing any dust or debris that might obstruct airflow. For the interior, carefully remove the front panel using a screwdriver, and use a vacuum with a soft brush attachment to clean dust and dirt from the internal components. Be cautious not to damage any delicate parts. Cleaning both the exterior and interior surfaces ensures that the unit operates efficiently and maintains a pleasant appearance. Regular maintenance prevents the buildup of grime, which can affect performance and air quality.
Step 3: Clear the Condenser and Evaporator Coils
The condenser and evaporator coils are critical for the air conditioner’s cooling process. Over time, they can accumulate dirt and dust, reducing their efficiency. To clean the condenser coils, first, turn off the power and locate the coils on the outdoor unit. Use a coil cleaner according to the manufacturer’s instructions, allowing it to foam and lift away dirt. Rinse thoroughly with a garden hose. For the evaporator coils, access them through the indoor unit, usually by removing the front panel. Use a coil cleaner and a soft brush to remove buildup. Ensuring these coils are clean improves heat exchange efficiency, allowing your air conditioner to cool your home more effectively and use less energy.
Step 4: Straighten and Clean the Fins
Fins play a vital role in the air conditioner’s heat exchange process. Bent or dirty fins can obstruct airflow, reducing efficiency. To clean the fins, first, turn off the power and remove any protective grilles to access the fins on both the indoor and outdoor units. Use a soft brush or fin comb to gently straighten any bent fins and remove accumulated dirt and debris. Be careful not to apply too much pressure, as the fins are delicate and can easily be damaged. Cleaning and straightening the fins ensures optimal airflow and improves the overall performance of your air conditioner, helping it run more efficiently and effectively.

Step 5: Inspect the Condensate Drain Line
The condensate drain is responsible for removing the moisture collected by the air conditioner. Over time, this drain can become clogged with dirt and debris, leading to water damage and reduced efficiency. Locate the condensate drain line, usually found near the indoor unit. Use a wet/dry vacuum or a pipe cleaner to clear any blockages. Pour a mixture of water and mild detergent through the drain to ensure it is clean and free-flowing. Regularly checking and cleaning the condensate drain prevents water buildup and potential damage, ensuring your air conditioner operates smoothly and maintains proper humidity levels in your home.
Step 6: Reassemble and Test the Unit
After completing the cleaning process, reassemble your air conditioner. Replace any panels or grilles that were removed, ensuring they are securely fastened. Restore power to the unit and turn it on to test its operation. Listen for any unusual noises and check that it is cooling effectively. Observe the airflow and temperature to confirm that the cleaning has improved performance. Regular testing after cleaning helps identify any issues early and ensures that your air conditioner is functioning at its best. This final step is crucial for maintaining the efficiency and longevity of your unit.
Conclusion
Regularly cleaning your air conditioner is essential for maintaining its efficiency and extending its lifespan. By following this step-by-step guide on how to clean an air conditioner, you can ensure your unit operates smoothly, providing optimal cooling while reducing energy consumption. A clean air conditioner also improves indoor air quality, creating a healthier environment for you and your family. Make it a habit to perform these maintenance tasks regularly to enjoy the benefits of a well-maintained cooling system.
FAQ
How often should I clean my air conditioner?
Ideally, you should clean your air conditioner at least once a year, preferably before the cooling season begins. Regular maintenance helps ensure the unit runs efficiently and prevents potential issues. During peak usage times, check the air filter monthly and clean or replace it as necessary.
Can I use any cleaning solution for my air conditioner?
It’s best to use cleaning solutions specifically designed for air conditioners, especially for the coils. Mild detergent and water are safe for cleaning filters and exterior surfaces. Avoid harsh chemicals that can damage the components and reduce the efficiency of your unit.
What should I do if my air conditioner still doesn’t work well after cleaning?
If your air conditioner continues to underperform after cleaning, check for any visible issues like loose connections or damaged parts. If the problem persists, it may be time to call a professional technician. Regular professional maintenance can help identify and fix underlying problems, ensuring your unit runs efficiently.


